Deploy A Contract On A Test Network
Last Updated on 22. May 2023 by Marianne Poser
To be able to pay the gas cost for the transactions on the Test Chain, Test Ether is needed. These can be obtained from different faucets. (Please inform yourself about a suitable Faucet).
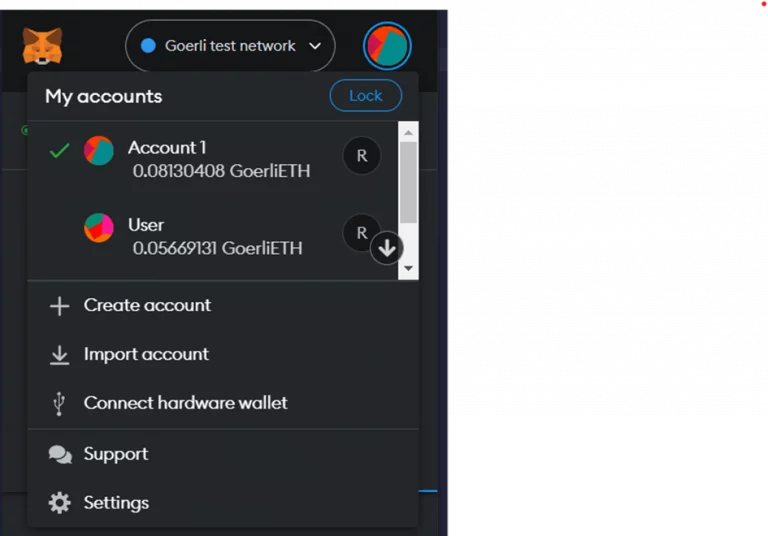
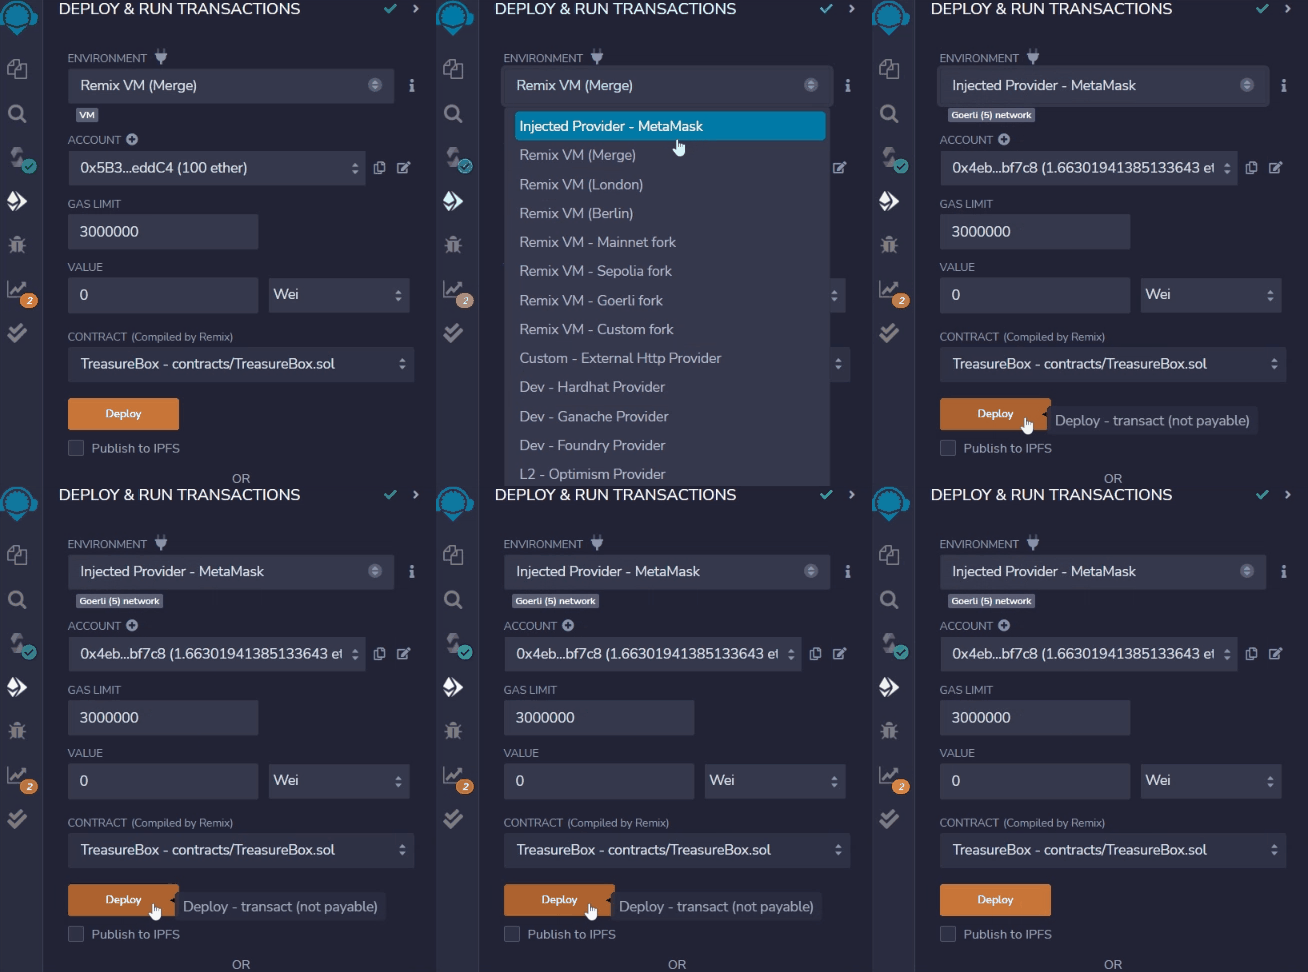
After setting up MetaMask, the adjustment in Remix can now be made to the test chain. To do this, “Injected Provider” must be selected in the “Environment” menu. Remix then connects to MetaMask, and you can select from which account you want to interact.
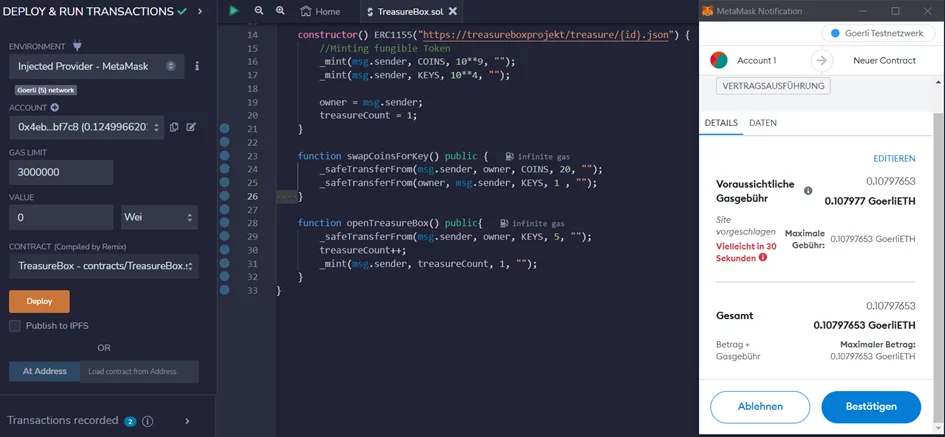
The deploy process is initiated as before by clicking on the button, but now a transaction is triggered. MetaMask will sign this transaction and forward it to the test network and needs confirmation. In addition, the transaction costs are displayed and if there are enough test Ether in the account, the transaction can be confirmed.
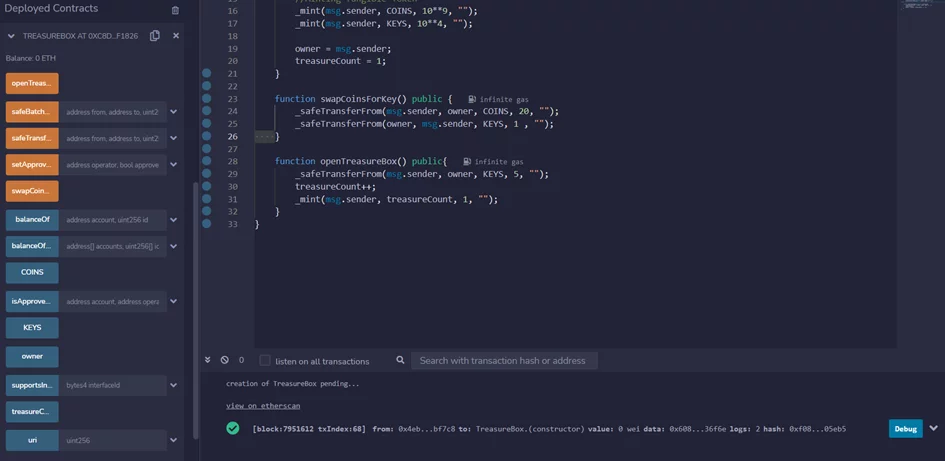
After confirmation, the transaction is initially in the “Pending” state, which is also indicated in the console. Once the transaction has been successfully added to the test chain, a green check mark appears in the console with the corresponding message. In the Deployed Contract tab, all functions of the contract can now be called up.
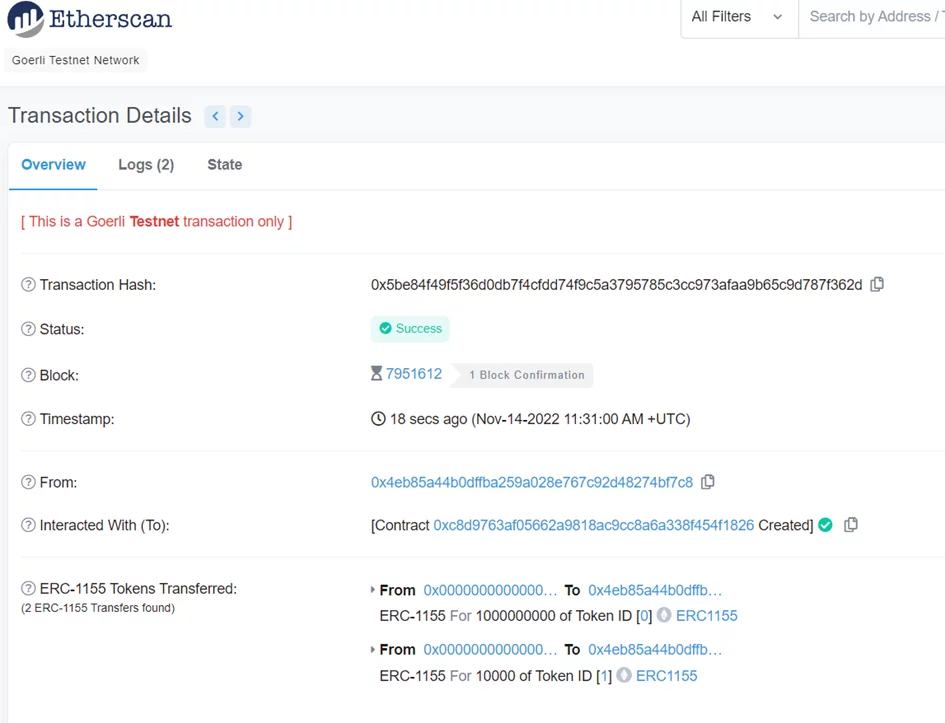
Besides the confirmation, you will also see the link to Etherscan in the Console. If you open this page, you can see in the lower section that the token was directly detected to be an ERC-1155 token. In addition, the section shows that two different types (with two different IDs) have been minted (transferred from the 0 address to the owner of the contract).
To interact with the smart contract, you can also use the platform’s own tool for Ethereum User Interface. For this, the ABI (application binary interface) and the address of the deployed contract must be entered.
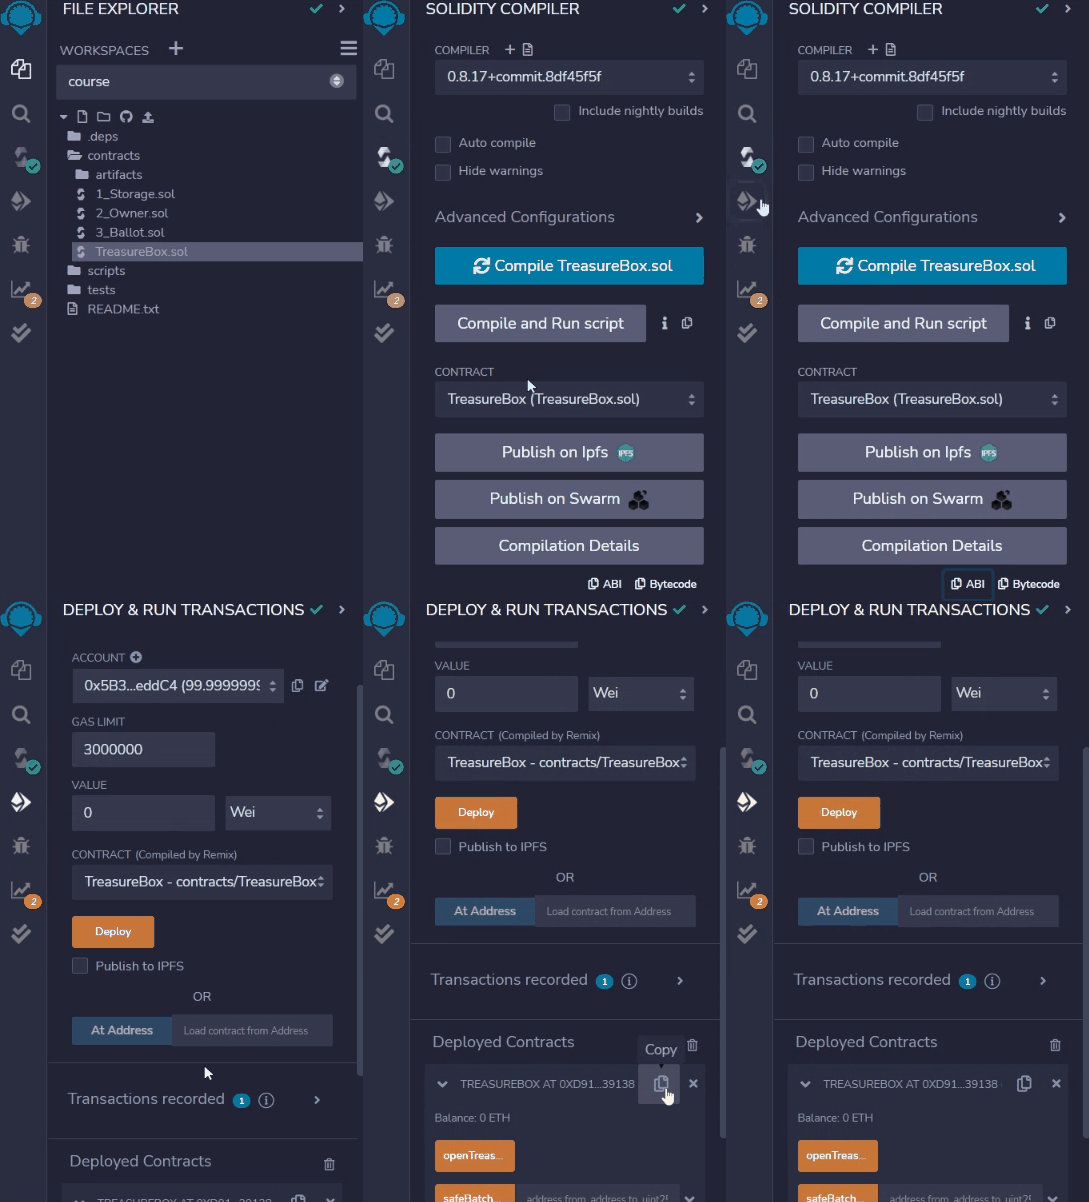
The ABI can be copied from Remix in the compiler tab at the bottom. The address is specified in the deploy tab in Remix. Feel free to test our tool.
Ethereum User Interface

 Register
 Sign in