Forking the Ethereum Mainnet Locally and Impersonate an Account
Last Updated on 20. March 2023 by Martin Schuster
Now, we want to virtually fork the Ethereum mainnet and take over control of an arbitrary account. Well, for safety reasons, we do this with the public Goerli test net instead of the real mainnet. The reason is that we want to create some transactions on the public network and check if they got execuded in our virtual fork or not. But Switching to the mainnet requires only changing the url of the archive node to the mainnet version.
Navigate to the folder hardhatTest and open the file hardhat.config.js with an editor.
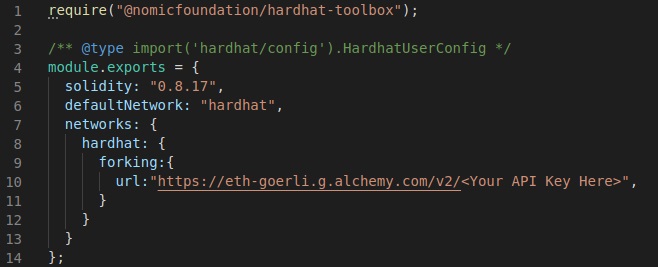
Enter the following lines in the curly brackets of module.exports = { }:
defaultNetwork: "hardhat",
networks: {
	hardhat:{
		forking:{
		url: "<url to archive node>",
		}
	}
}
Replace <url to archive node> with the url to your archive node. Use the testnet url!
Open your editor and navigate to the folder hardhatTest/scripts. There, create a file forkTest01.js
Copy the following source code.
const hre = require("hardhat");

main();

async function main() {

    // defin accounts
    account1 = "<Add address of account 1>";
    account2 = "<Add address of account 2>";

    // Print the balances of two of our accounts to the console
    await hre.ethers.provider.getBalance(account1).then(console.log); // insert address of account 1
    await hre.ethers.provider.getBalance(account2).then(console.log); // insert address of account 2

    // impersonate one of our accounts
    await hre.network.provider.send(
        'hardhat_impersonateAccount',
        [account1] // copy your account address here
    );

    // sign a transaction with your impersonated account
    const signer = await hre.ethers.provider.getSigner(account1);

    await signer.sendTransaction({
        to: account2,
        value: ethers.utils.parseEther('0.0001'), // make sure you have enough ETH on this account.
    })

    // Print the new balances of two of our accounts to the console
    hre.ethers.provider.getBalance(account1).then(console.log); // insert address of account 1
    hre.ethers.provider.getBalance(account2).then(console.log); // insert address of account 2
}
Line 1: We need to include the library hardhat
Lines 8 and 9: Here, we copy the addresses of our two Goerli testnet accounts. Make sure that account 1 has sufficient Goerli ETH.
Lines 12 and 13: We use the library ethers.js that comes along with hardhat. This is very convenient for us. With provider.getBalance, we request the balance from our forked virtual network. At this stage, the balances of our accounts should be the same as on the public Goerli testnet. The output is a hexadecimal value.
Lines 16 – 19: Hardhat provides us with a number of pre-filled accounts. But it doesn’t know the private key of our real Goerli testnet account. If we want to use this account on our virtual (forked) network, we can pretend to have its private key and tell hardhat to impersonate this account. Here, we impersonate account 1.
Lines 21 – 27: We want to send a small amount to our second account. For that purpose, we define a signer. The signer is our account 1 that we have impersonated.
Lines 30 and 31: Again, we print out the balances of both of our accounts to the console. You should see different values compared to the first two printouts. We see that the transaction in our virtual network worked. Run the script from above with:
npx hardhat run --network hardhat scripts/hardhatForkTest01.jsThis command executes the script in your hardhatForkTest01.js file.
You will see that the balances have changed. But if you check the real Goerli testnet via MetaMask, you will see the original balances of your accounts. This is because the transaction was only performed in our local virtual network.

Pinning a block while forking the Mainnet
By default, hardhat uses the latest block when forking a network. But sometimes, it is necessary to go back in time and use the state at the time of a certain block. This is what we call pinning a block.
Pinning a block is pretty easy with hardhat.
Add the following lines to your hardhat.config.js:
networks: {
	hardhat:{
		forking:{
		url: “<url to archive node>”,
		blockNumber: <add block number>
		}
	}
}
Don’t forget to enter the url and the number of the block that you want to pin.

 Register
 Sign in